In this article we will learn how to export test cases from a Quality Center project to Microsoft word.
The Document Generator enables you to create a hard copy of the data contained in a Quality Center project. You can select information from the Quality Center modules. For example, from the Test Plan module, you can choose which folders and tests to include from the test plan tree, sort this data alphabetically or in a custom sort order, and display the data as lists or tables.
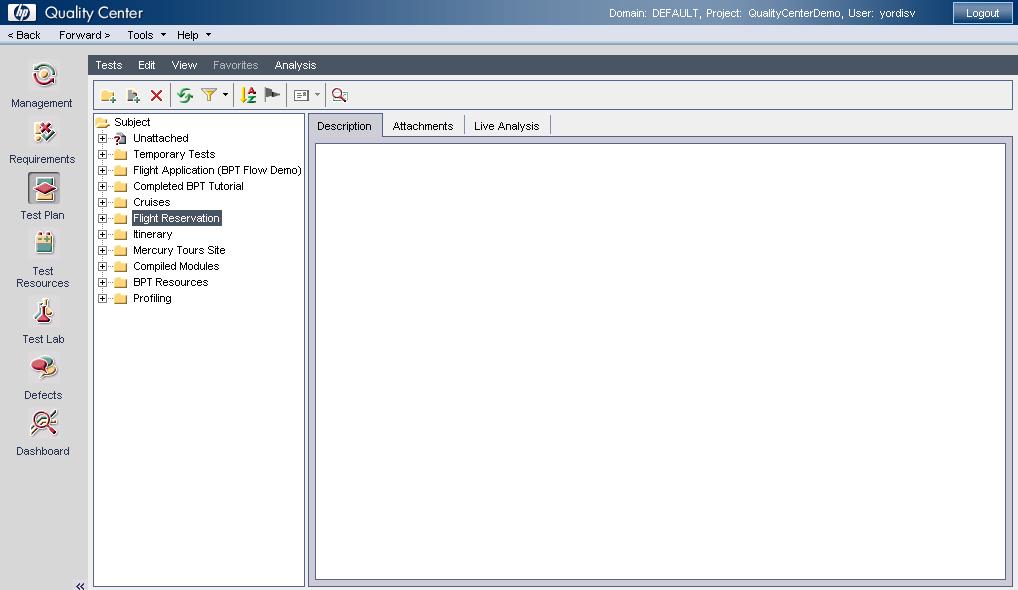
We are going to be exporting for this article the test cases that are in the folder “Flight Reservation” in Test Plan module.
Follow these steps:
Step 1. Locate Test Case path in Test Plan Module.
Step 2.Open Document Generator window
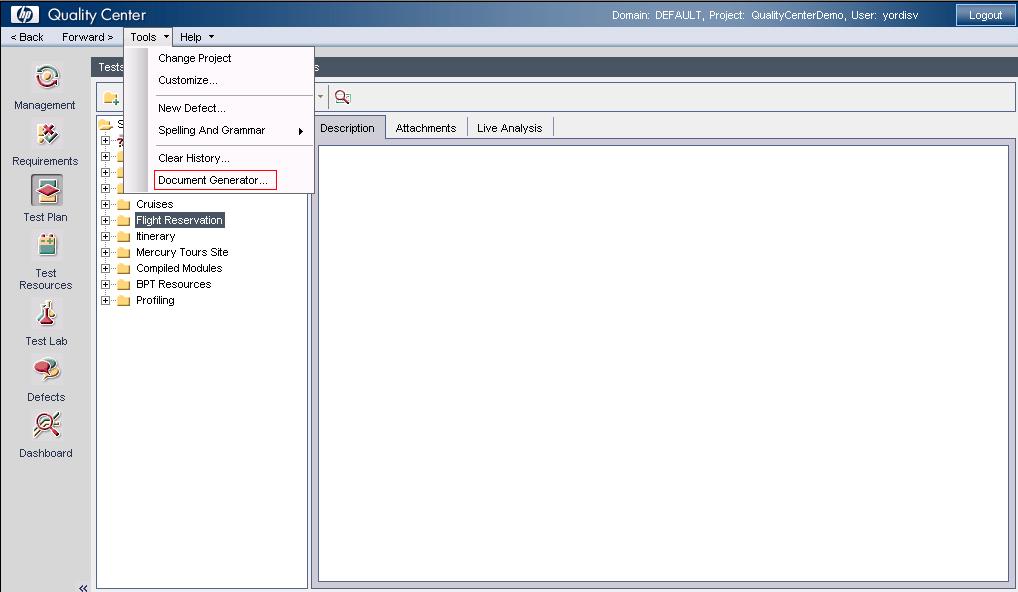
To start the Document Generator, click the Tools button on the upper-left of the Quality Center window. Choose Document Generator. The Document
Generator opens.
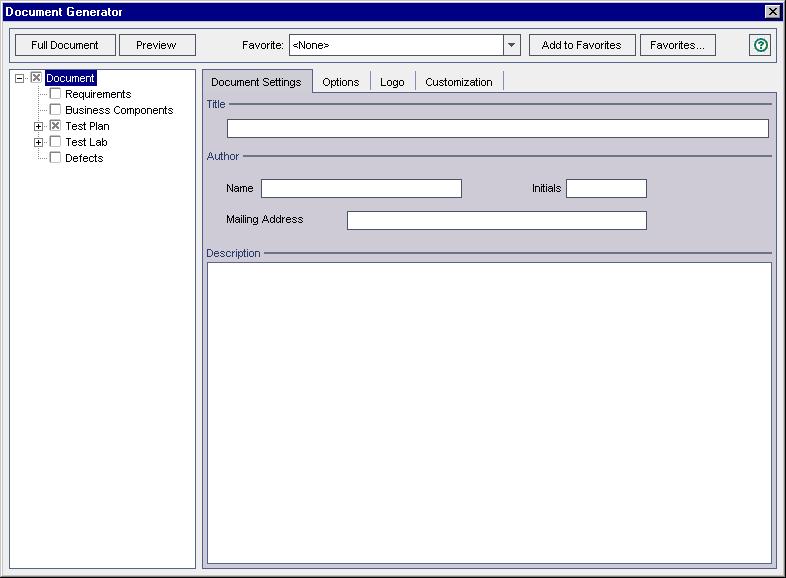
Click on Document to set formatting instructions that control how the document will look and what is included in the cover page. By default, the Document link is selected in the Document Generator tree and the Document Settings tab is displayed
Document Setting tab type a title for the document, Author Details, Initial and email address and description of the document. These information are optional.
Options tab, select what you want to include or see in your document. For example, , create a table of contents and an index, and place test scripts and file attachments in the text of your document.
logo tab, you can load image from file, unload image that you would like to display in your document.for example, you can print a company logo on each
page of the document.
Customization You set formatting instructions in order to determine how your project document will look.
Step 3. Test Plan
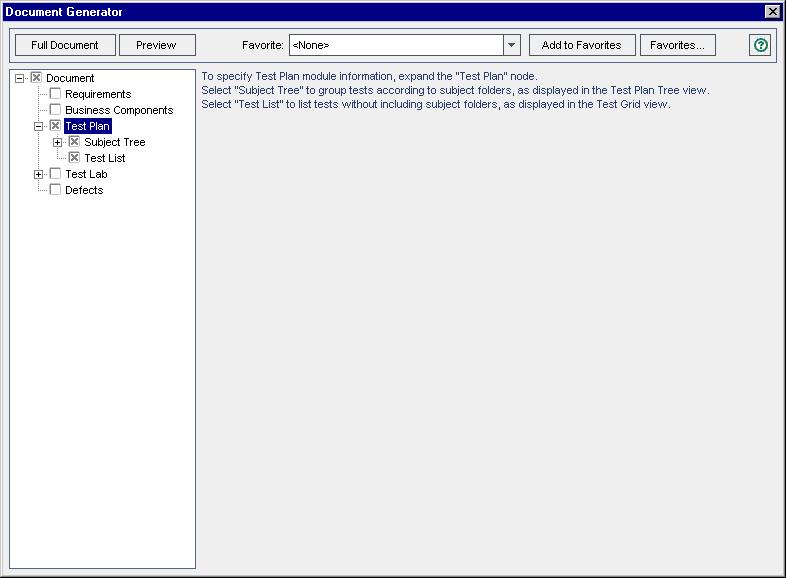
Since the information for the document that we want to generate is located in Test Plan, we have to select Test Plan and expand the Test Plan node in the Document Generator tree.
Expand the Test Plan node in the Document Generator tree. Select the Subject Tree check box and click the Subject Tree link. The Subject Tree
page is displayed
Step 4. Subject Tree
You use the Subject Tree pages to specify the information from the test plan tree view of the Test Plan module that should appear in the project document.
Select the Subject Tree check box and click the Subject Tree link. The Subject Tree page is displayed
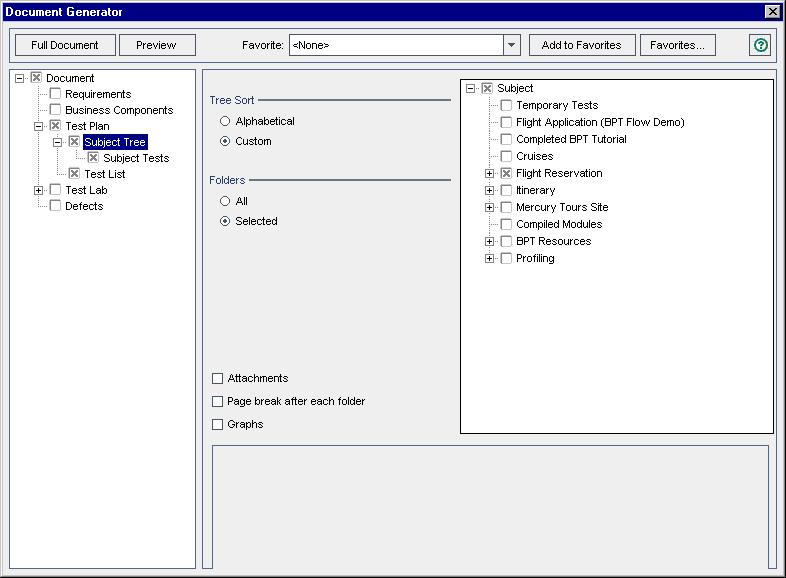
Determine the order (Alphabetical or Custom) under Tree Sort. In our case select Custom.
Specify under Folders, which test plan tree you want to include (All or Selected).
Choose Selected to export just the test cases contained in folder Flight Reservation from the Test Plan tree structure on to the right pane
Select attachment if you want to include in the document.
Page break after each folder to insert page break in project document after each test folder subject.
You can also include graphs by selecting Graphs.
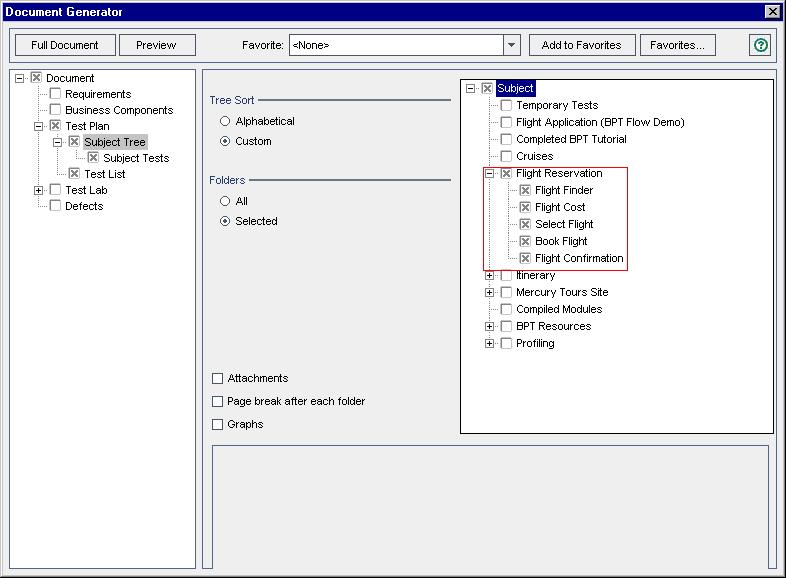
Step 5. Subject Tests
You use the Subject Tests pages to specify the information from the test plan tree view of the Test Plan module that should appear in
the project document
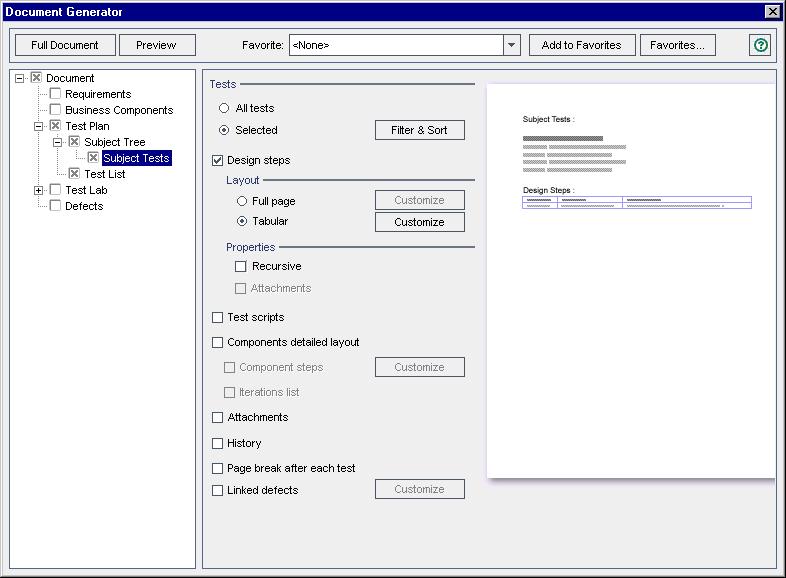
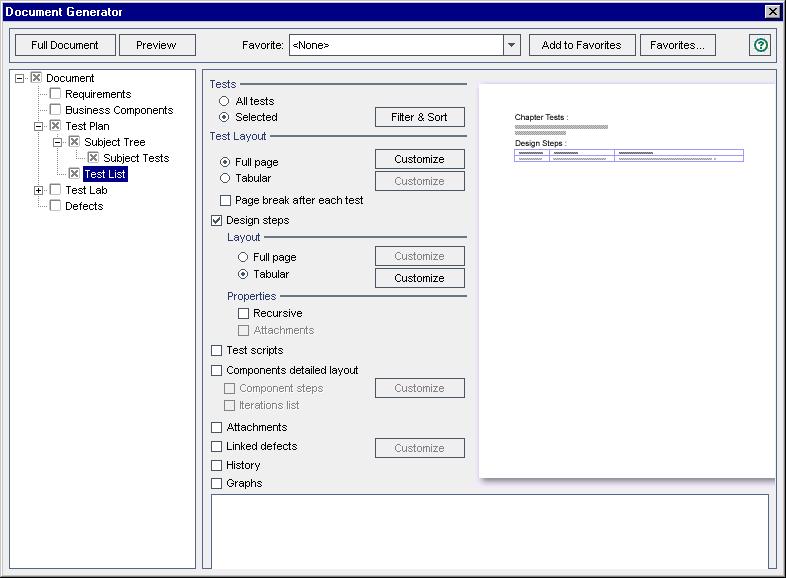
Under Tests select Selected, Design steps and click on Filter & Sort Button to bring up Filter window.
On filter Condition Tab, look for Subject field Name and hit the button in filter condition column.
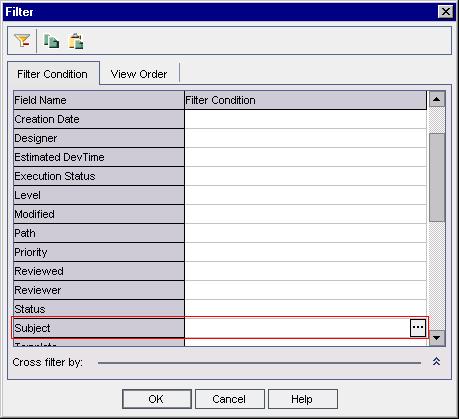
This will bring up Select Filter Condition Window. As you can see it has Test Plan tree structure.
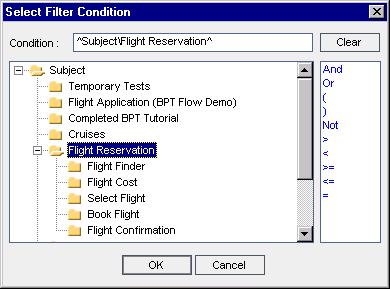
Click OK button to go back to Filter Window. As you can see, now Subject field has a value in Filter condition column.
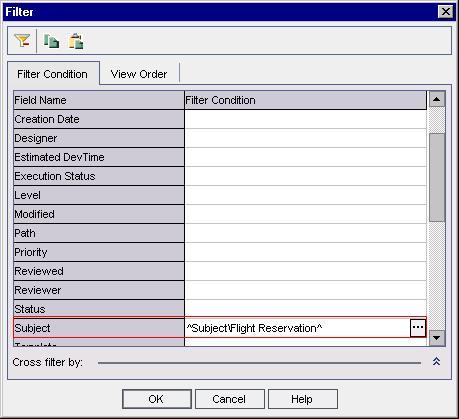
Hit on OK button to return to Document Generator Window.
Under Layout select Full Page or Tabular.
To include test scripts in the document, select Test scripts.
If you use Business Process Testing, you can include the layout of the components included in the tests. Select Components detailed layout and
choose what to include in the detailed layout:
- To include component steps, select Component steps. Click the Customize button to open the Tabular Layout dialog box to customize the component steps table. Use the Tabular Layout dialog box to choose the defect columns that will appear in the table, and to set the column order, width and captions.
- To include the iteration list, select Iterations list.
To include test attachments in the document, select Attachments.
To display a list of all the changes made to the tests, and which user made each change, select History.
To insert page breaks in the project document after each test, select Page break after each test.
To include a table of linked defects, select Linked defects. Click the Customize button to open the Tabular Layout dialog box to customize the
linked defects table. Use the Tabular Layout dialog box to choose the defect columns that will appear in the table, and to set the column order, width
and captions. You can also specify whether to display only defects that have been directly linked to tests or to include indirectly-linked defects as well.
Step 6. Test List
You use the Test List page to specify the tests from the Test Grid that should appear in the project document. For more information about the Test Grid.
Expand the Test Plan node in the Document Generator tree. Select the Test List check box and click the Test List link. The Test List page is displayed. Repeat the steps from step 5.
Step 7. Add to Favorite
After you have set the formatting instructions and specified the document’s content, you can save the document settings as a favorite view for future use
and generate the document.
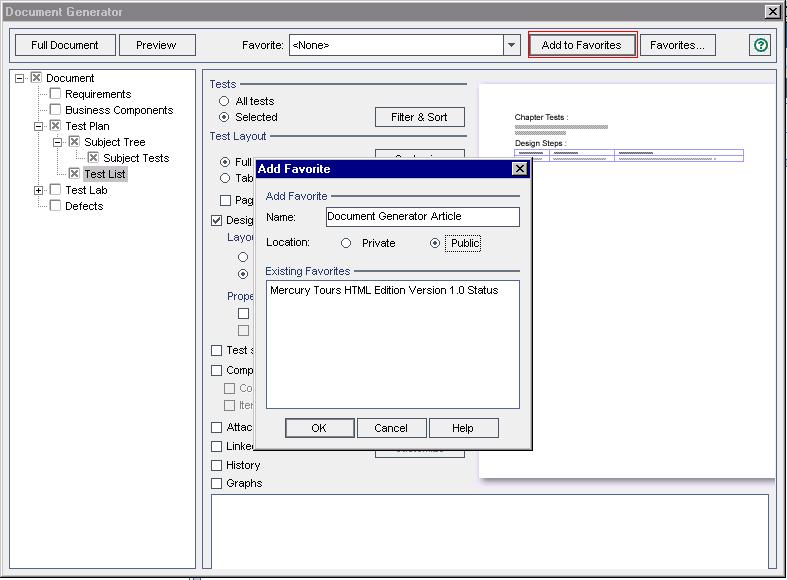
Click in Add to Favorites button, Add Favorite dialog box opens, enter a name in the name box and set the location as Private or Public and hit the OK button to return to Document Generator Window.
Step 8. Generate the Document
After you set formatting instructions and specify project data, you can generate the project document. You save the document as a Microsoft Word file.
Tip: You can generate a preview project document that enables you to quickly see how the document will look, without all the detail included. To generate a preview project document, click the Preview button. Quality Center opens Microsoft Word and displays the preview project document.
To generate a project document:
- If there are open project document files from previous runs of the Document Generator, close the files.
- Click the Full Document button. The Save As dialog box opens.
- In the Save As box, set the location for the document in your network file system.
- In the File name box, assign the document a name.
- Click the Save button.
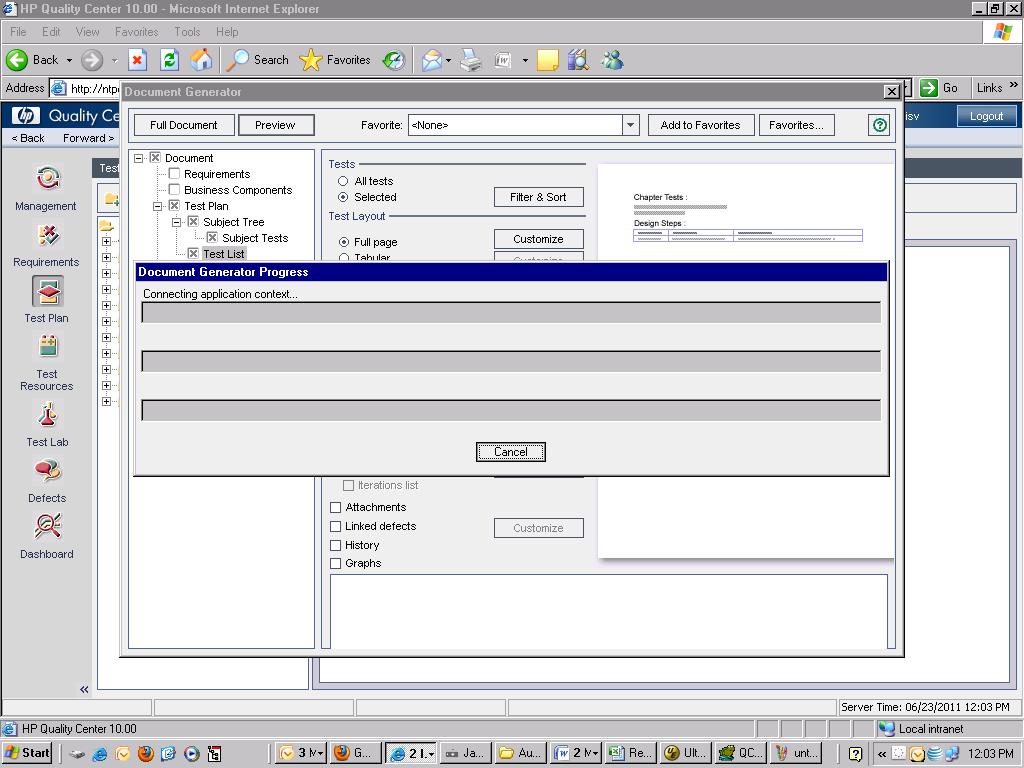
Quality Center begins generating the document and a dialog box displays document creation progress. To cancel document generation, click the Stop
button.
When the process is complete, Microsoft Word opens and displays the document.
If the generated document contains links to attachments, a folder is created in the same location as the document, and the attachment files are copied to this folder. The name of the attachment folder is the name of the document with the suffix “_Attachmentsâ€. If you send the document to someone, you can send the attachment folder along with it so that the recipient can access the attachments by using the links
After document generation is complete, you can view and edit the document in Microsoft Word. The information for each module that you select is printed in a separate chapter of the project document.
Close Document Generator window to return to your project.




 initiative
Do you know if the document generator in QC 9.0 works with Word 2010? I am trying to export some tests to Word and I get an error “Invalid Procedure Call or Argument:5” It asks to enable macros twice before this message appears.
Posted by Bill | September 13, 2011, 1:52 amI want to download the test cases in excel format…
is there any chance for that
Posted by Sathiya | November 9, 2011, 7:46 pmSelect the testcases u want to download using the Ctrl+a then right click and select export…..u can save the excel file where u want.
Posted by Devendar | December 16, 2011, 1:08 amThe excel only exports the design steps but not the attachments and descriptions
Posted by Lakshman Vadlamani | February 21, 2012, 9:05 pmGreat Tips!
Posted by Harry | March 21, 2012, 10:33 pmI am using QC 9.2. It says “out of memory error” when I try to get the report. What do I do to get the Test cases in an excel or document form ?
Posted by Neha | August 30, 2012, 5:46 pmVery very good explanation but also need the same from Test Lab module.Anyone can explain plz
Posted by sambu | February 17, 2013, 4:29 pmSuperb
Posted by Divya | May 30, 2013, 11:09 amHi, I would like to create folders that just stores documents, how do I do that in QC? the folders should be in such a way that I should be able to get a notification if document has been attached.
Posted by peu | November 14, 2013, 5:33 amTo fix the “Invalid Procedure Call or Argument:5″ error reported above:
1. Open MS Word 2010
2. Navigate to Option–> Trus Center –>Trust Center Settings –> Protected View –> Uncheck the ‘Enable Data Execution
Prevention Mode’
3. Restart the Word and check.
Posted by David Bushnell | January 16, 2014, 3:54 pmHello. I got the cannot create file C:\XXXX\DocGen\TDMain.dot file error.
Wondering how i can tweak this.
Posted by szaliz | June 6, 2014, 8:01 amI’m able to export only some test cases in a word doc. The export is based on “Ccenario=FCNQ”. All test cases have been created with “Scenario=FCNQ” as seen in Details tab. I don’t understand why not all of them are exported. Any idea?
Posted by stephane jobin | June 11, 2014, 11:14 pmI found the problem. I’ve generated my export in Preview mode. I just saw that this mode do a partial export. When you’re satisfifed with the appearence of your word doc then you have to click full document!
Posted by stephane jobin | June 12, 2014, 12:18 am