Till now we have discussed various modules of Quality Center. In this article we will discuss another important module of HP’s Quality Center (ALM) know as Defects Module.
Defects Module of QC helps a tester in logging defects when any issues are found in test case execution.
Here is a step by step introduction to this module. (Click on the images below to view them in full size)
- Log into the Quality Center with your user name and password. Select the domain name and project name.
- Click on the Defects module present on the left hand side of the application.
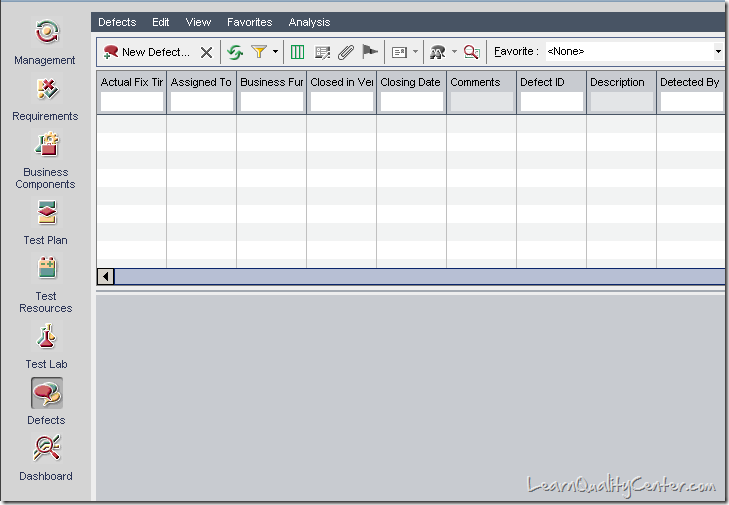
- When a new project is created the defects window will be blank – without any data.
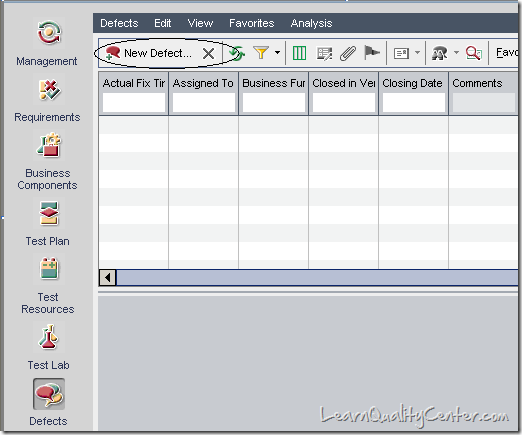
- Click on the “New Defect†(Alt+N) button present below the menu bar to create a new defect.
- Once the “New Defect†button is clicked, a window opens up as shown below.
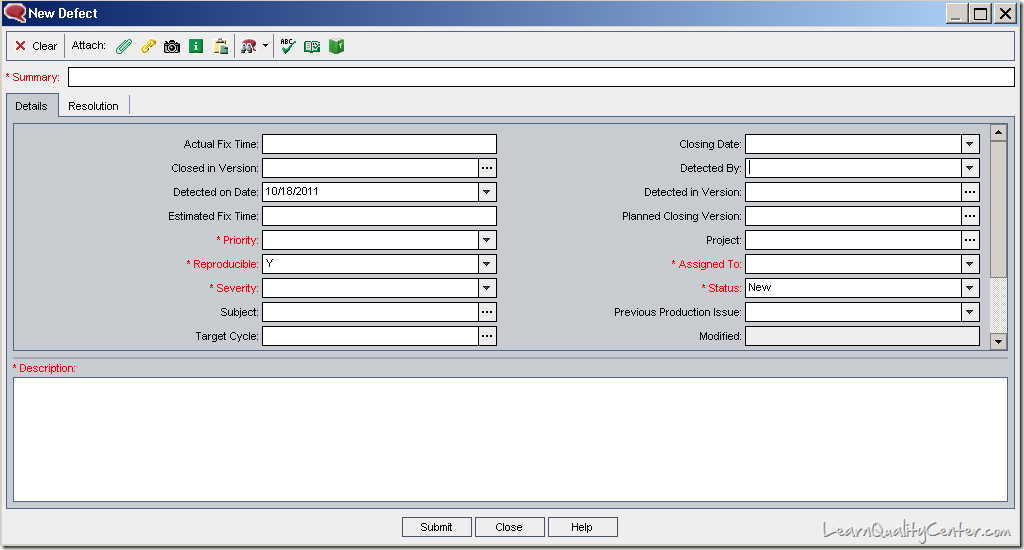
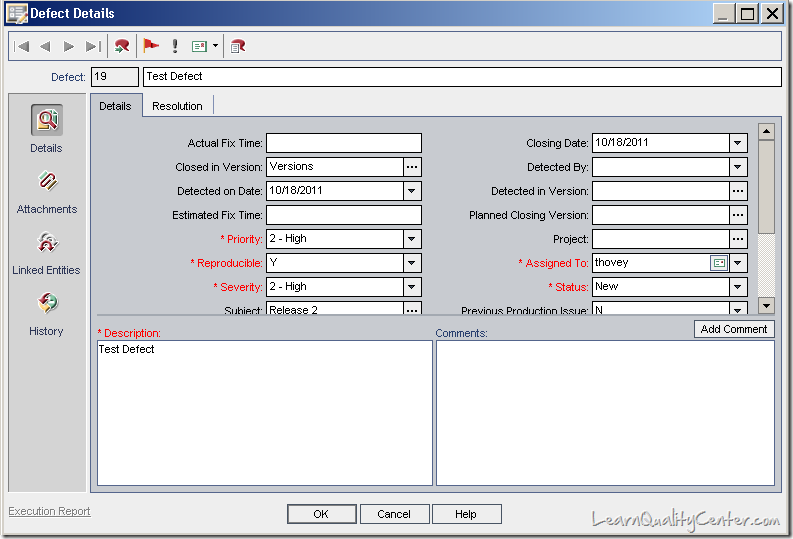
- There are various fields such as Summary,Priority,Reproducible,Severity,Detected by, Description etc.The ones marked in red are the mandatory fields and they need to be filled by the tester.
- The tester should fill in all the details for the new defect as shown below.
- After entering the summary, we would now give a detailed account of the defect under description area
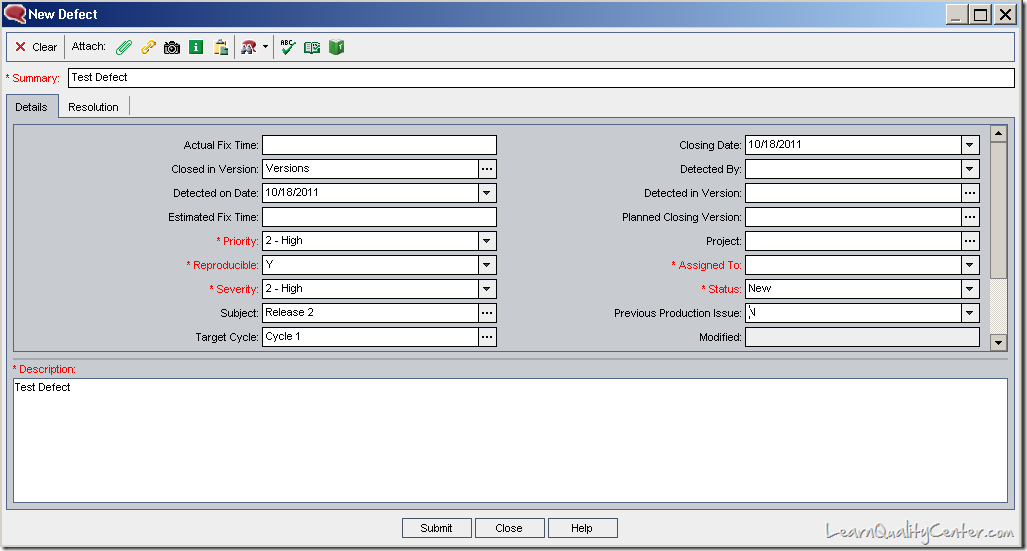
- For a better explanation of a defect, we can divide it into following:
- Steps to reproduce:This would include the step wise reproduction of defect, right from the login of the application being tested to the logout. It can also include:
- The Pre-conditions required to reproduce the defect.
- Test Data required to reproduce the defect.
- Expected Result: This includes the expected system/application (under test) behavior as opposed to the defect (Actual result). It can also include:
- Design document references.
- Requirements document references.
- Actual Result: This includes the current system/application (under test) behavior as opposed to the expected result.
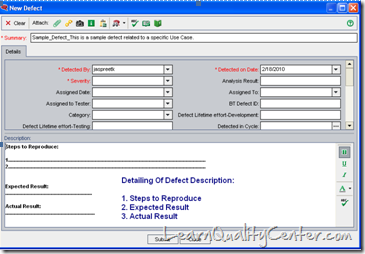
- Steps to reproduce:This would include the step wise reproduction of defect, right from the login of the application being tested to the logout. It can also include:
- Severity/Priority: The most important of all is deciding the severity & priority of defect. When raising a defect, testers are often confused about the difference between defect’s severity and its priority. The dictionary speak the following:
Severity – Causing very great pain, difficulty, anxiety, damage, etc.
Priority – Something that is very important and must be dealt with before other things.
The severity is the domain of the tester and they should be capable of recording this. For testers, severity is the impact of the defect on the application and their ability to continue testing. The priority is the domain of the business and should be entered by them against each defect raised to reflect the importance of the change to them. For instance, a spelling mistake would be deemed as a low severity by the tester, but if this mistake occurs in the company name or address, this would be classified as high priority by the business.
To summarize:
Priority = Business = Order of Fixing
Severity = Tester = Failure of Application Above order of priority and severity can be changed to maintain consistency. - QC will auto navigate you to the previous screen (summary of defects screen), and here we would have our newly raised/logged defect with a unique defect id auto assigned by QC
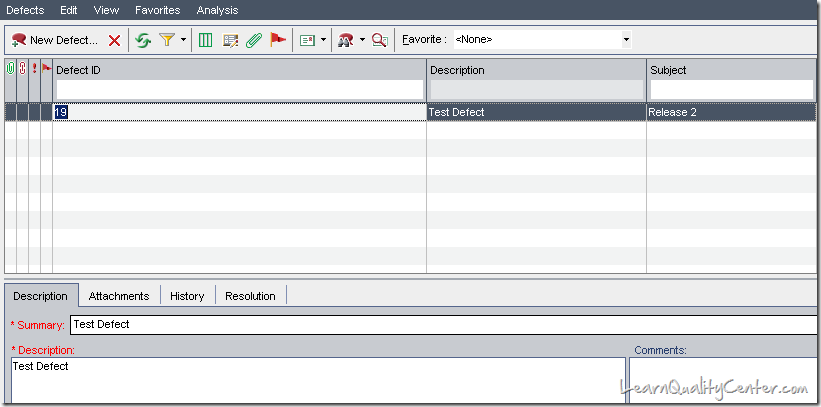
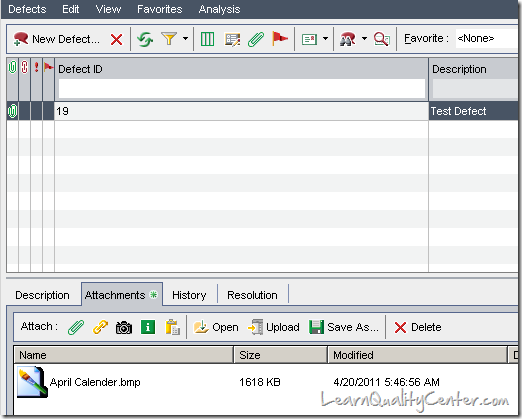
- The user (tester) can attach screenshots by clicking on “Attachments†tab next to “Description†tab
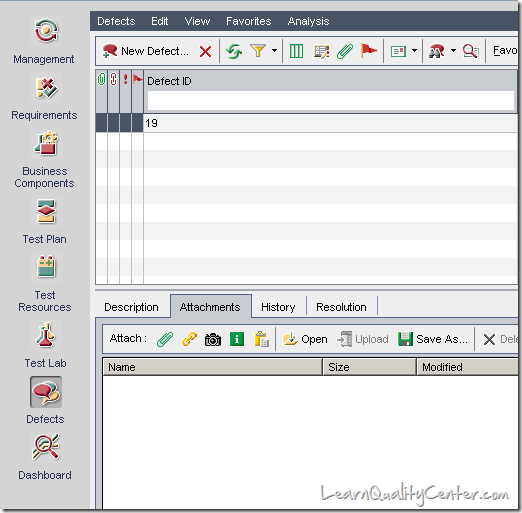
- Click on “Attach†section and add the snap shots for the corresponding defect logged as per the snap shot as shown below.
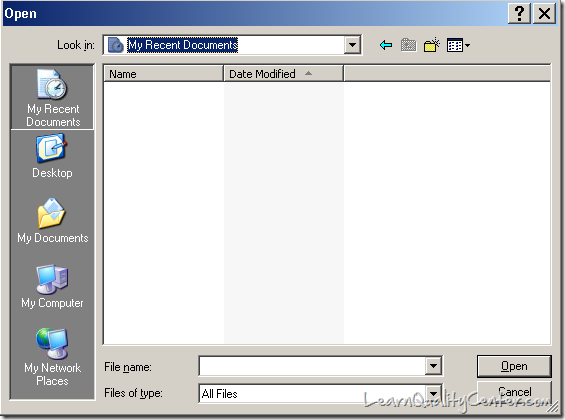
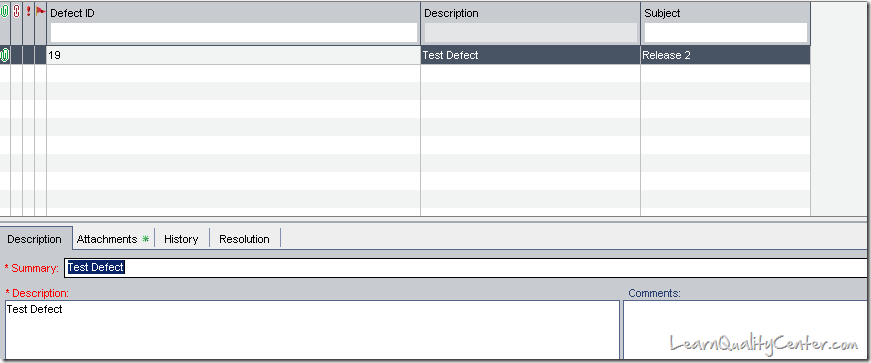
- Comments can be provided in the Add comments section on the right hand side of the window.
- Defect details can be viewed once the user double clicks on the defect as shown below.
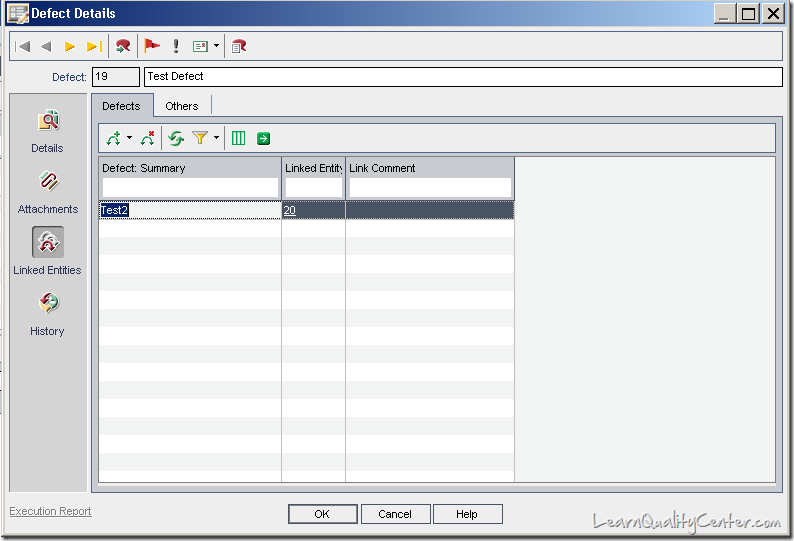
- There is a field on the left hand side “Linked Entitiesâ€. Here a user can link similar defects created for different platforms. Example: A tester while executing a test case finds a similar issue across Win 2000, Win XP, Win 7 etc then the tester can log three different defects but link all the defects to each other so that a developer can fix all the defects at once.
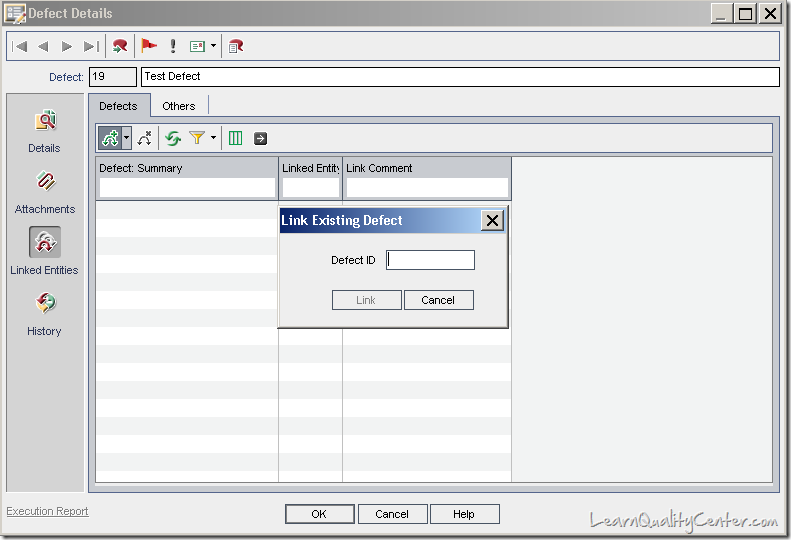
- The defect ID that was generated above should be supplied here for linking the defects to each other as shown below.
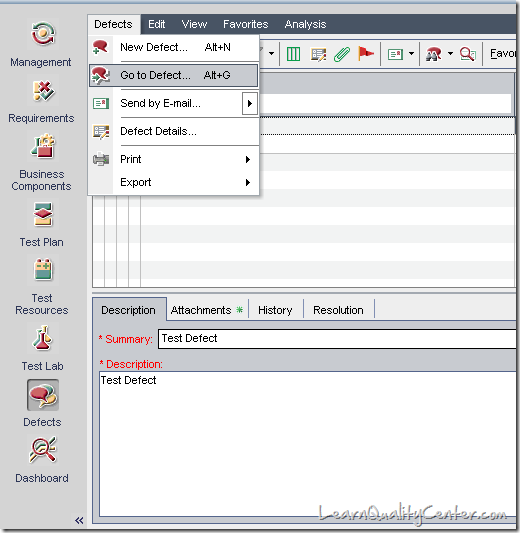
- A user can navigate to any defect by clicking on the option “Go to Defectâ€. This option can be found on the “Defects tab†present on the menu bar.
- You also have an option – “Send by Email†to send an email for the defect created.
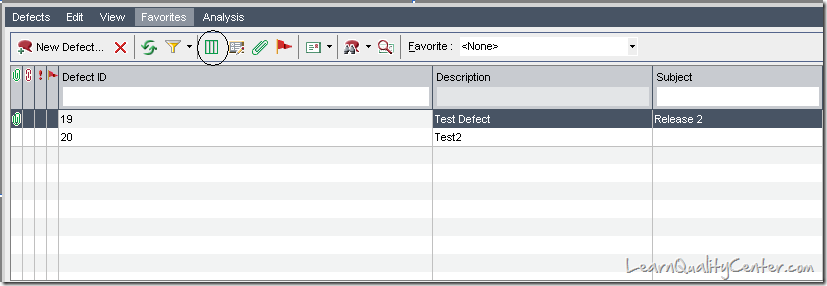
- Under the Menu bar we have an option to select the columns required to display on the defects window.
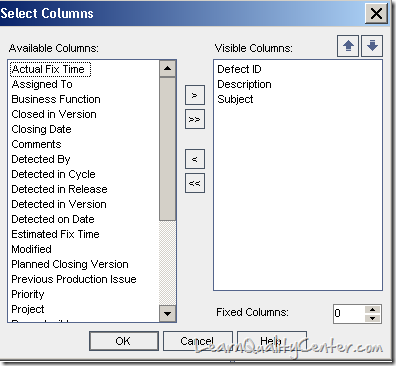
- Once a user clicks on the “Select Column†field the pop up opens as shown below. A user can then select the required columns needed to be displayed on the Defects Window.
That is all about the Defects Module of Quality Center.
Please share this article with your friends by clicking on the Facebook “Like†button on the left side.




 initiative
wow it’s amazing. Keep rocking
Posted by Deepak | November 29, 2011, 4:00 pmThanks to LearnQtp.com.
It is very helpfull to me….
Posted by hemalatha | December 15, 2011, 7:51 amI am trying to figure out (1) why sudddenly my defect history is blank (2) how to turn it back on.
Posted by cantu | March 20, 2012, 1:44 amhow can we alter the values of severity listbox to new values as s1,s2,s3 and s4.
thanks…in advance..
gajendra
[email protected]
Posted by gajendra | September 28, 2012, 10:46 amThanks to learnqualitycenter.com
It is very useful and easy to learn…
Posted by Janani | January 21, 2013, 5:47 pmVery useful inforamtion being lerner i love this website.
thanks.
Posted by Jaya | March 26, 2013, 10:35 pmPlease let me know how to include a value in list of Select Columns >> Available Columns of Defect Window.
For e.g In HPQC that iam using currently, in Defect window, i dont have “Modified” attribution in list of “Available Columns” for selection. Refer Screen 21 above.
Someone please guide.
Posted by Sharanya | August 19, 2013, 10:36 am