Once you create the tests in the Test plan tree, you need to create detailed test steps for your tests in the Test plan. This quick reference procedural article lets you learn that quickly and practice. It appropriately explains this in different ways i.e., using standard tool bar buttons, menu items or short cut keys.
Step 1. In the Test plan, navigate to the required test for which you need to write detailed test steps.

Step 2. Select “Design Steps†tab.

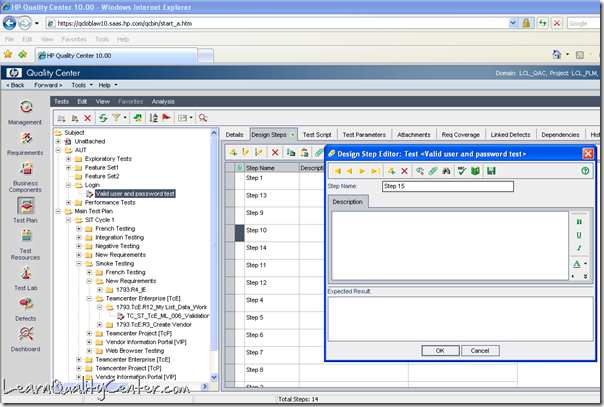
Step 3. There are three ways to create test steps. You can insert as many steps as you want for your test by one the following way and pressing OK button.
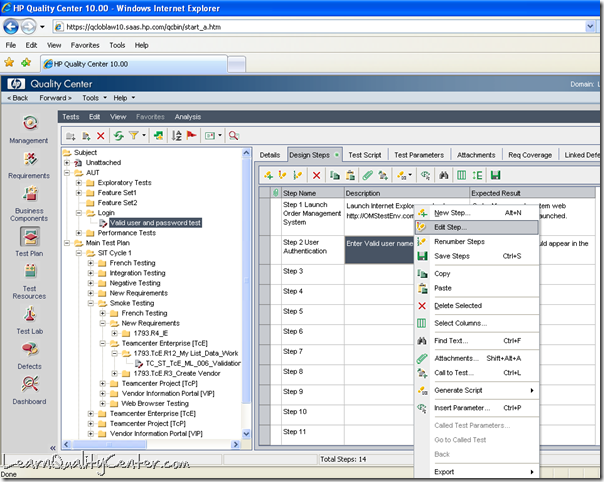
a. Right click and select “New Step†from the pop-up menu
b. Click “New Step†button ![]()
c. Press Alt+N shortcut key
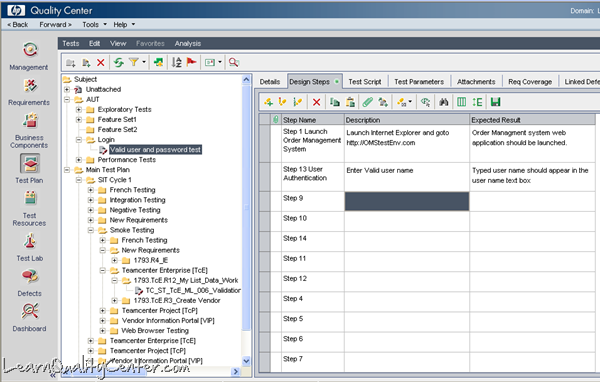
Step 4. Depending upon which step the mouse cursor is placed the next step will be inserted subsequently. In the following screenshot there are 14 steps added in random order. Next time when you create next step, you can notice that “Step Name†edit box shows incremented value as “Step 15†in “Design Step Editor†window. This is the feature of HPQC. However you can always change the step name as wish you.
Best practice, it is recommended that you keep Step # as the prefix and add meaningful Step name (for example, Step 1 Launch application), so that when you use “Renumber Steps†feature, the steps gets renumbered properly.
Step 5. Enter the exact action you as a tester going to perform on the AUT in the “Description†edit box and the behavior of the AUT that is expected after the action in the “Expected Result†edit box.

Step 6. You can renumber the steps in two ways.
a. Right click and select “Renumber Steps†from the pop-up menu
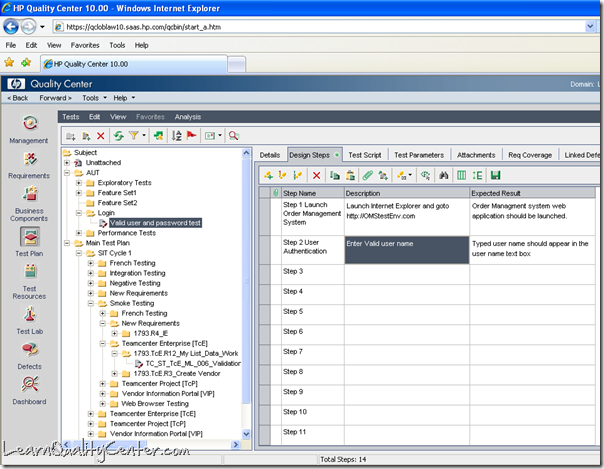
b. Click “Renumber Steps†button ![]() . You could notice that the step number properly gets renumbered (as in below screenshot)
. You could notice that the step number properly gets renumbered (as in below screenshot)
In the next article we “ll talk about ways to change the existing test step, action (description) or Expected Result


 initiative
Discussion
No comments yet.